Editing Pages
To edit event pages, go to Manage Events and select your event, and then click on Edit Page.
Here, you'll see your page listing where you can add new pages and edit existing pages.
The page editor gives you full flexibility to customize your event pages and bring your ideas to life.
Creating pages
To insert a new page, click on Create New Page and enter a page title and path.
The page title and path can be changed at any time.
Using the page editor
The sidebar contains many useful elements that you can drag and drop onto your event page, including an event banner, video and chat, photos and much more.
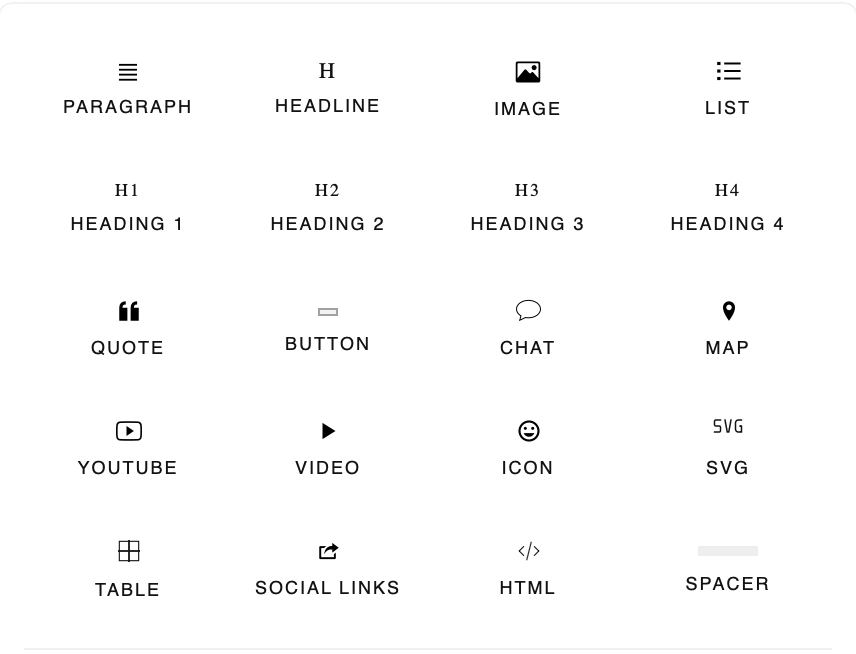
You can also click on the + button to add elements to your event pages.
This will bring up a menu that looks like this:
Manage page listing
You can use this option to edit the order in which pages show up in the sidebar.
Default pages
There are 3 default pages:
Main event page
This is your main event page where all users will go to access your event.
Registration page
If you've enabled the option to redirect unregistered users to a custom page, this page will show up in the page editor.
This is a custom page you can use to encourage users to register for your event.
Payment page
If you've enabled the option to redirect users who haven't paid to a custom page, this page will show up in the page editor.
This is a custom page you can use to encourage users to pay for your event.